Good morning folks
I hope you are well and hopefully, like me, you are enjoying the sunshine. I thought I'd take some time to share with you a few of the steps I took to make my Wonky House book Cover. The basic cover kit contains 2 plain covers, a spine and one detailed laser cut design.
To make a traditional cover you will need to add some binding cloth or fabric to adhere the two covers and spine to each other.
Cut your fabric slightly larger than the spine (I tend to add approx 2cm)
Use something like DecoArt Faux Finishing Medium to glue the spine and covers in place as seen, leaving a gap of around 3 to 4 mm between the spine and cover.
Flip the cover over and fold and glue the top and bottom in place. (Just a quick note, because these small covers do not have a double layered cover; if you do this kind of cover I would suggest that when it is all dry you glue a piece of card (either plain if you are painting over, or patterned.) to cover the edge of the binding)
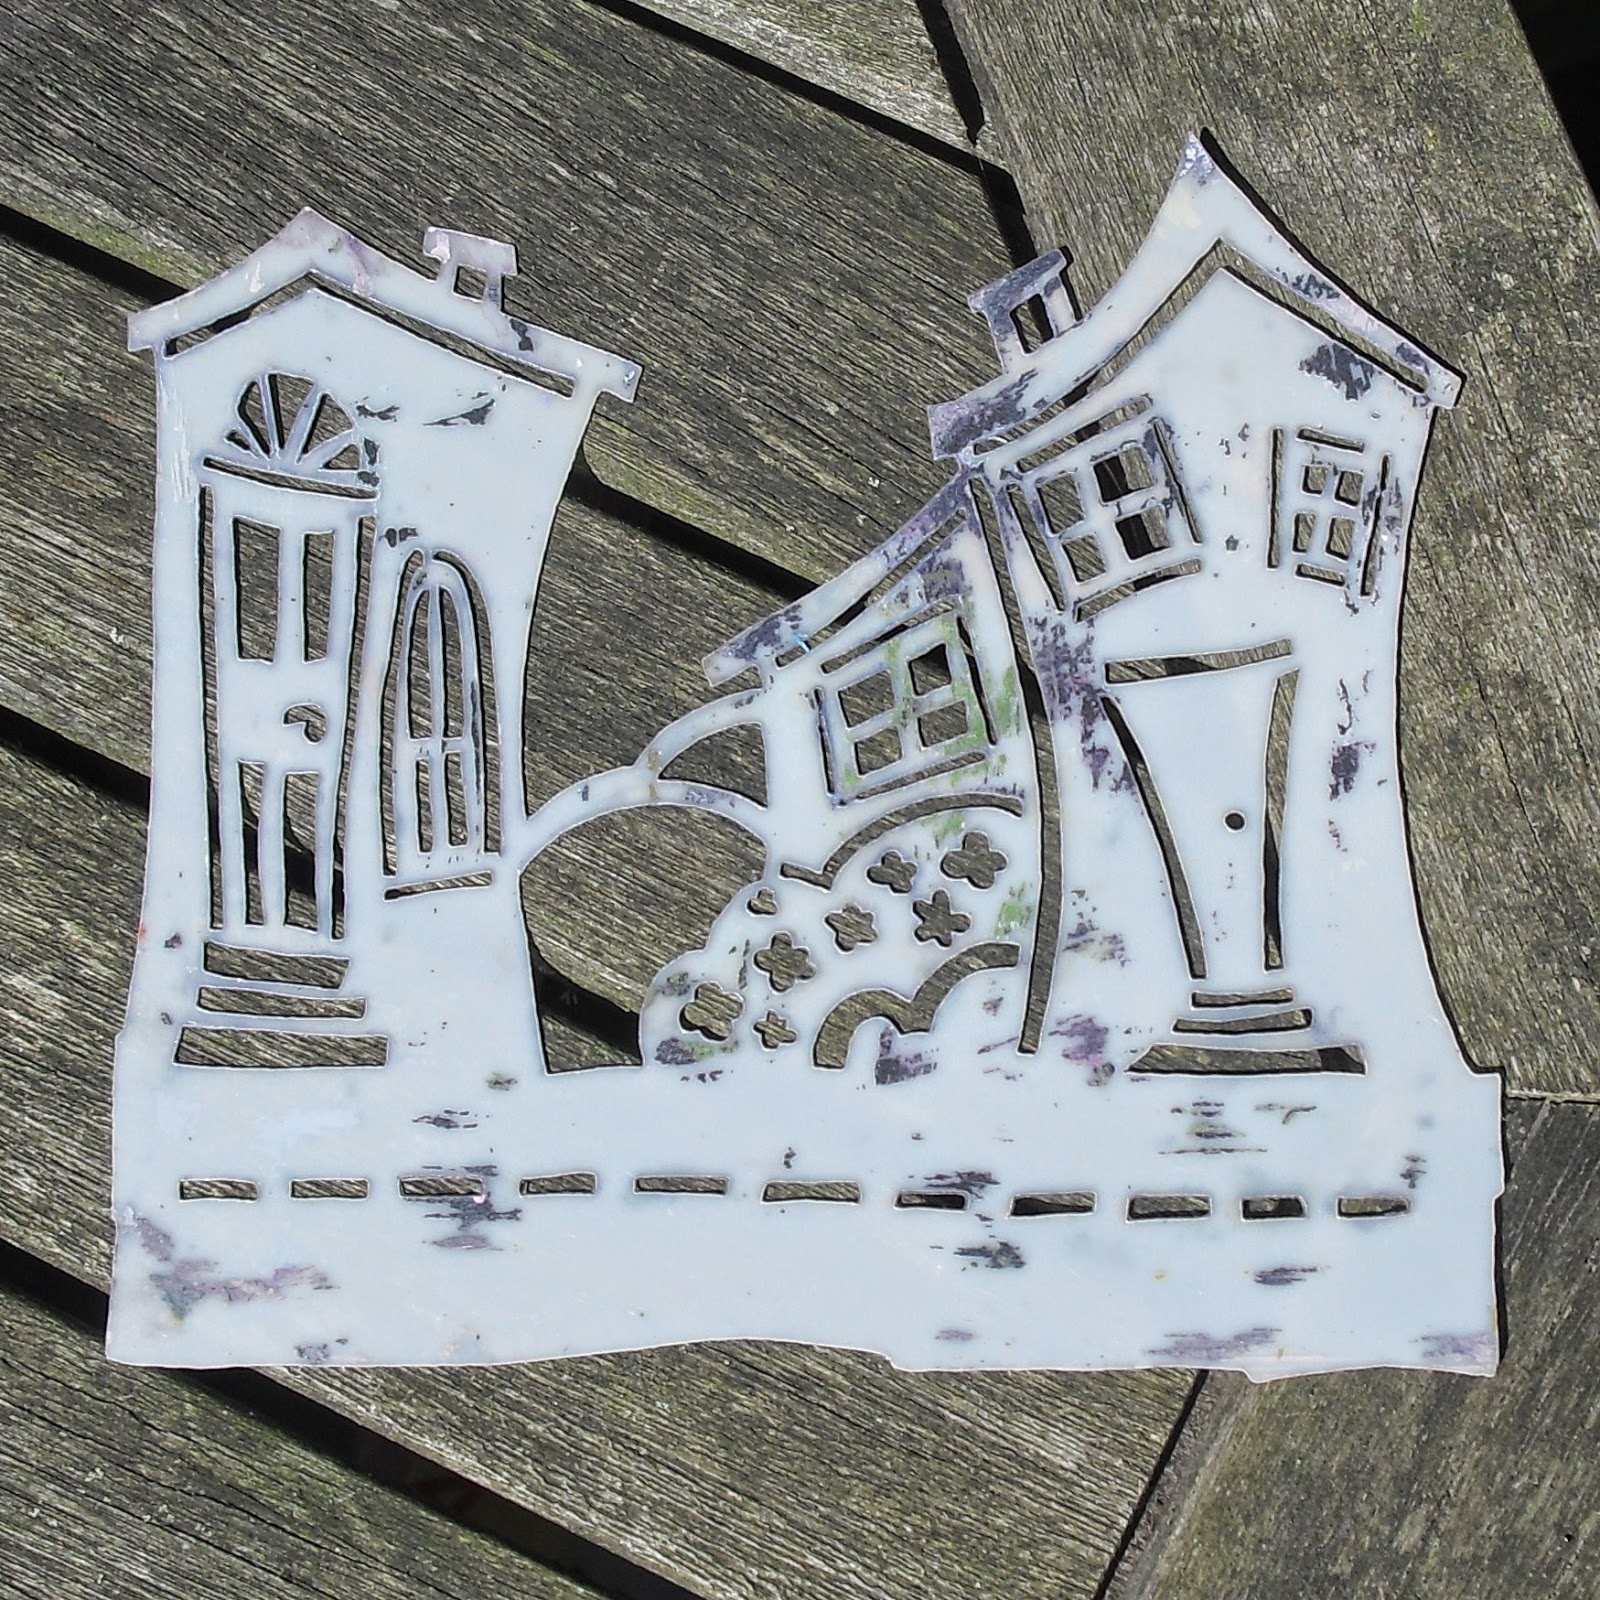
Right, back to the book......this book has a matching mask available (sold separately) which comes in handy for the next bit
Take the mask and position it onto the cover, making sure it is facing the same way you want the design to be and use yellow paint to add "light" to the windows.
Repeat with red paint to highlight the doors and walls etc. Yes, it looks messy now but don't despair.
Use the mask to add green paint too. Then, remove the mask and paint your covers with a few blue paints. You can see here that I painted the spine in the same colour too. Add some random stamping and allow to dry.
Add colour to the main element as desired. Glue in place onto the cover, lining up with the masked painted areas.
End result, Lights on! I think it looks cool. To finish off I added a layer of Triple Thick Glaze to the base, some flowers add a detail and a small sentiment.
So, there you have the cover....hope you like it and it makes sense lol
I'll do a separate post another day for the inside as this has turned out to be a pretty long post already.
Take care and I hop you have a great day.


8 comments:
just surfing around seeing who has posted for WOYWW since the link isn't up yet. The wonky house book is really cool and I think your directions were easy to follow. Hope you have a great week. Vickie
This is just teasing ! Hope Lisa stocks them soon and that I do not miss them in the scrum. Love this . Have a good week and weekend
Alison
This looks great Neil! x
Love the look of the lighted windows...great effect ;)
xoxo Sioux
Love the wonky houses, Neil!! I so want this set! Great tutorial on how to add 'lights'! You always amaze us...fab work!
That looks great Neil, I love the light in the windows.
Thank you Neil for the instructions on how to put the book together - all makes sense now. I look forward to the inside.
Thank you Neil for the instructions on how to put the book together - all makes sense now. I look forward to the inside.
Post a Comment